When the weather starts turning cooler I start dreaming of the first batch of my best cinnamon rolls. It seems that I only make them in the colder months. Cinnamon rolls are comfort food for sure, and nothing smells better on a cold winter’s day than a pan right out of the oven.

Here are a few simple tips to help you make the best cinnamon rolls.
Tips and Tricks
*Make sure your liquid is not too hot. It should be between 110 to 115 degrees. If you heat your milk in the microwaveable sure it’s only for short 30-second intervals. Otherwise, it can get too hot and will kill the yeast. Check the temperature with a food thermometer if you have one. The liquid should be warm to the touch. (Just like in the three bears story: not too hot and not too cold-just right).
*The butter for your filling should be room temperature, not melted. Always make sure your butter is still “lumpy” and soft, not quite melted, and not quite hard.
*Don’t rush the rising of the dough. Different climates will create different situations where it may slow it down. Have patience.
*Always check to make sure the yeast you are using has not expired. The expiration date will be on the package and should be easy to find.
*There are 2 kinds of yeast.
Active dry yeast
The first is active dry yeast, which must be dissolved in liquid before it’s added to the rest of the dough ingredients. This is called “proofing”. It needs to set for 3-5 minutes until bubbles start to form on the top and before adding it to the dry ingredients.
Quick rise yeast
The second type of yeast is instant yeast, also known as quick-rise yeast. I really love this one. It can be added to the dough without any ‘proofing’ required but it still needs to be dissolved in the milk and sugar to help get it started.
*White sugar or brown sugar? Everyone has their own preference for which type of sugar to use in the filling, so I’ll give you a rundown on the differences between each one.
White Sugar
White sugar will give you a “cleaner” look to the filling. In other words, the filling stays intact, does not run as much, and is not as gooey, but it’s still as sweet as you want the filling to be.
Brown Sugar
Brown sugar will give your filling a gooey caramel flavor and is similar to sticky buns. The filling is more prone to run out and around each roll. It really is your personal preference on which sugar to use but both are great and each one will give you a different look and taste.
*Everything that goes into your dough needs to be room temperature or at a specific temp that the recipe calls for. This includes the eggs as well. Cold ingredients will inhibit the growth of the yeast. If you happen to store your flour in the freezer, for example, you will want to set it out for 15 mins so that it will be room temp.
Here we go!
In a large mixing bowl, combine 2 cups of flour, sugar, salt, and yeast. Mix well. Set this aside.
In a smaller microwave-proof bowl, heat water, milk, and butter until warm (110 to 115 degrees). Pour this into the mixing bowl.

Mix it together
Add the warm liquid and egg to the flour mixture. You will want to blend this at low speed until the flour is incorporated into the liquids.

Add an additional 1 to 1 1/2 cups of flour to your mixture until the dough starts pulling away from the bowl.
*Tip Slowly add the last 1 to 1 1/2 cups of flour to your mixture. Depending on your altitude and temperature, you may need more or less. The dough is ready when it feels slightly sticky to the touch but is still able to form a ball. At this point, it is better to have less flour than more. Remember, you will add more flour as you roll it out.
Start adding more flour
Knead the dough on the floured surface, adding in 1 to 1 1/2 cups of flour until the dough is smooth and elastic. This should take between 5 to 8 minutes if you’re doing it by hand. If you have a dough hook on your mixer you can use that as well, adding flour in small increments until the dough is smooth and has formed a ball.

Cover and let it rest
Cover the dough and let it rise in a warm place (80 to 85 degrees) until it is doubled in size, about 45 to 60 minutes.
Tip*Here’s a little trick I have used for the past 30+ years: If you have stone countertops or the area where the dough will be rising is a little drafty, place the bowl of dough on a heating pad. I turn mine on medium heat. This gives it just enough warmth for the dough to rise. Otherwise, your bowl will be in contact with the cold surface of your countertop and it will take longer for the dough to rise.
Heating Pads are very different
Heating pads are all slightly different so I would recommend starting off on low heat and if it’s not overly hot you can turn it up to medium. Remember, you don’t want to “cook” your dough. If it’s too warm it will kill the yeast.

Cover the dough lightly with a cloth.

The dough after it has doubled in size.

Once the dough has doubled in size, punch it down several times to remove all the air bubbles.
Tip* How to make the dough a day ahead: after the first rise time, punch down the dough and cover and refrigerate it overnight. The next day you will shape the dough and let it rise as directed for the rest of the recipe. This is a great timesaver!
Generously grease a 13×9 inch pan. (Or smaller individual pans if you desire).
Roll out the dough
On a lightly floured surface, roll out the dough into an 18×12-inch rectangle.

Add the filling
Spread with the butter (room temperature, not melted)over the top of the dough, going to within 1/4 ” of the edge. Next, add your choice of sugar (brown or white), and then a generous amount of cinnamon. A common mistake is to not add enough cinnamon. It may look like a lot while you are sprinkling it onto your dough but remember the dough will rise and spread and you will need enough cinnamon to have enough flavor on each roll.
I decided to use brown sugar for this batch. The cinnamon is sprinkled on top of the brown sugar.

Roll up evenly across the log, ending with the seam side down.

Cut in 1-inch slices. This usually makes around 18-20 slices.

You can even cut them larger if you want bigger fluffy rolls. It’s your choice, just be sure and give them extra room to rise in the pan. Put slices into a prepared pan. Cover; let rise until light and double in size.
I made this batch for a few friends so instead of one pan I prepared several just for convenience.

Heat oven to 375 degrees.
*Tip: To make your cinnamon rolls with even more gooey richness, after they have risen and right before going into the oven, I like to add 1/8 cup melted butter to 1/2 cup room temp cream. Mix together and GENTLY pour between and around the edges of the cinnamon rolls. Be careful not to pour directly on the rolls, as it may cause them to lose their rise and they will shrink. I have even substituted the cream for Half and Half or whole milk and have had very good results as well. This just gives the rolls a little extra gooeyness love.❤
Time to bake
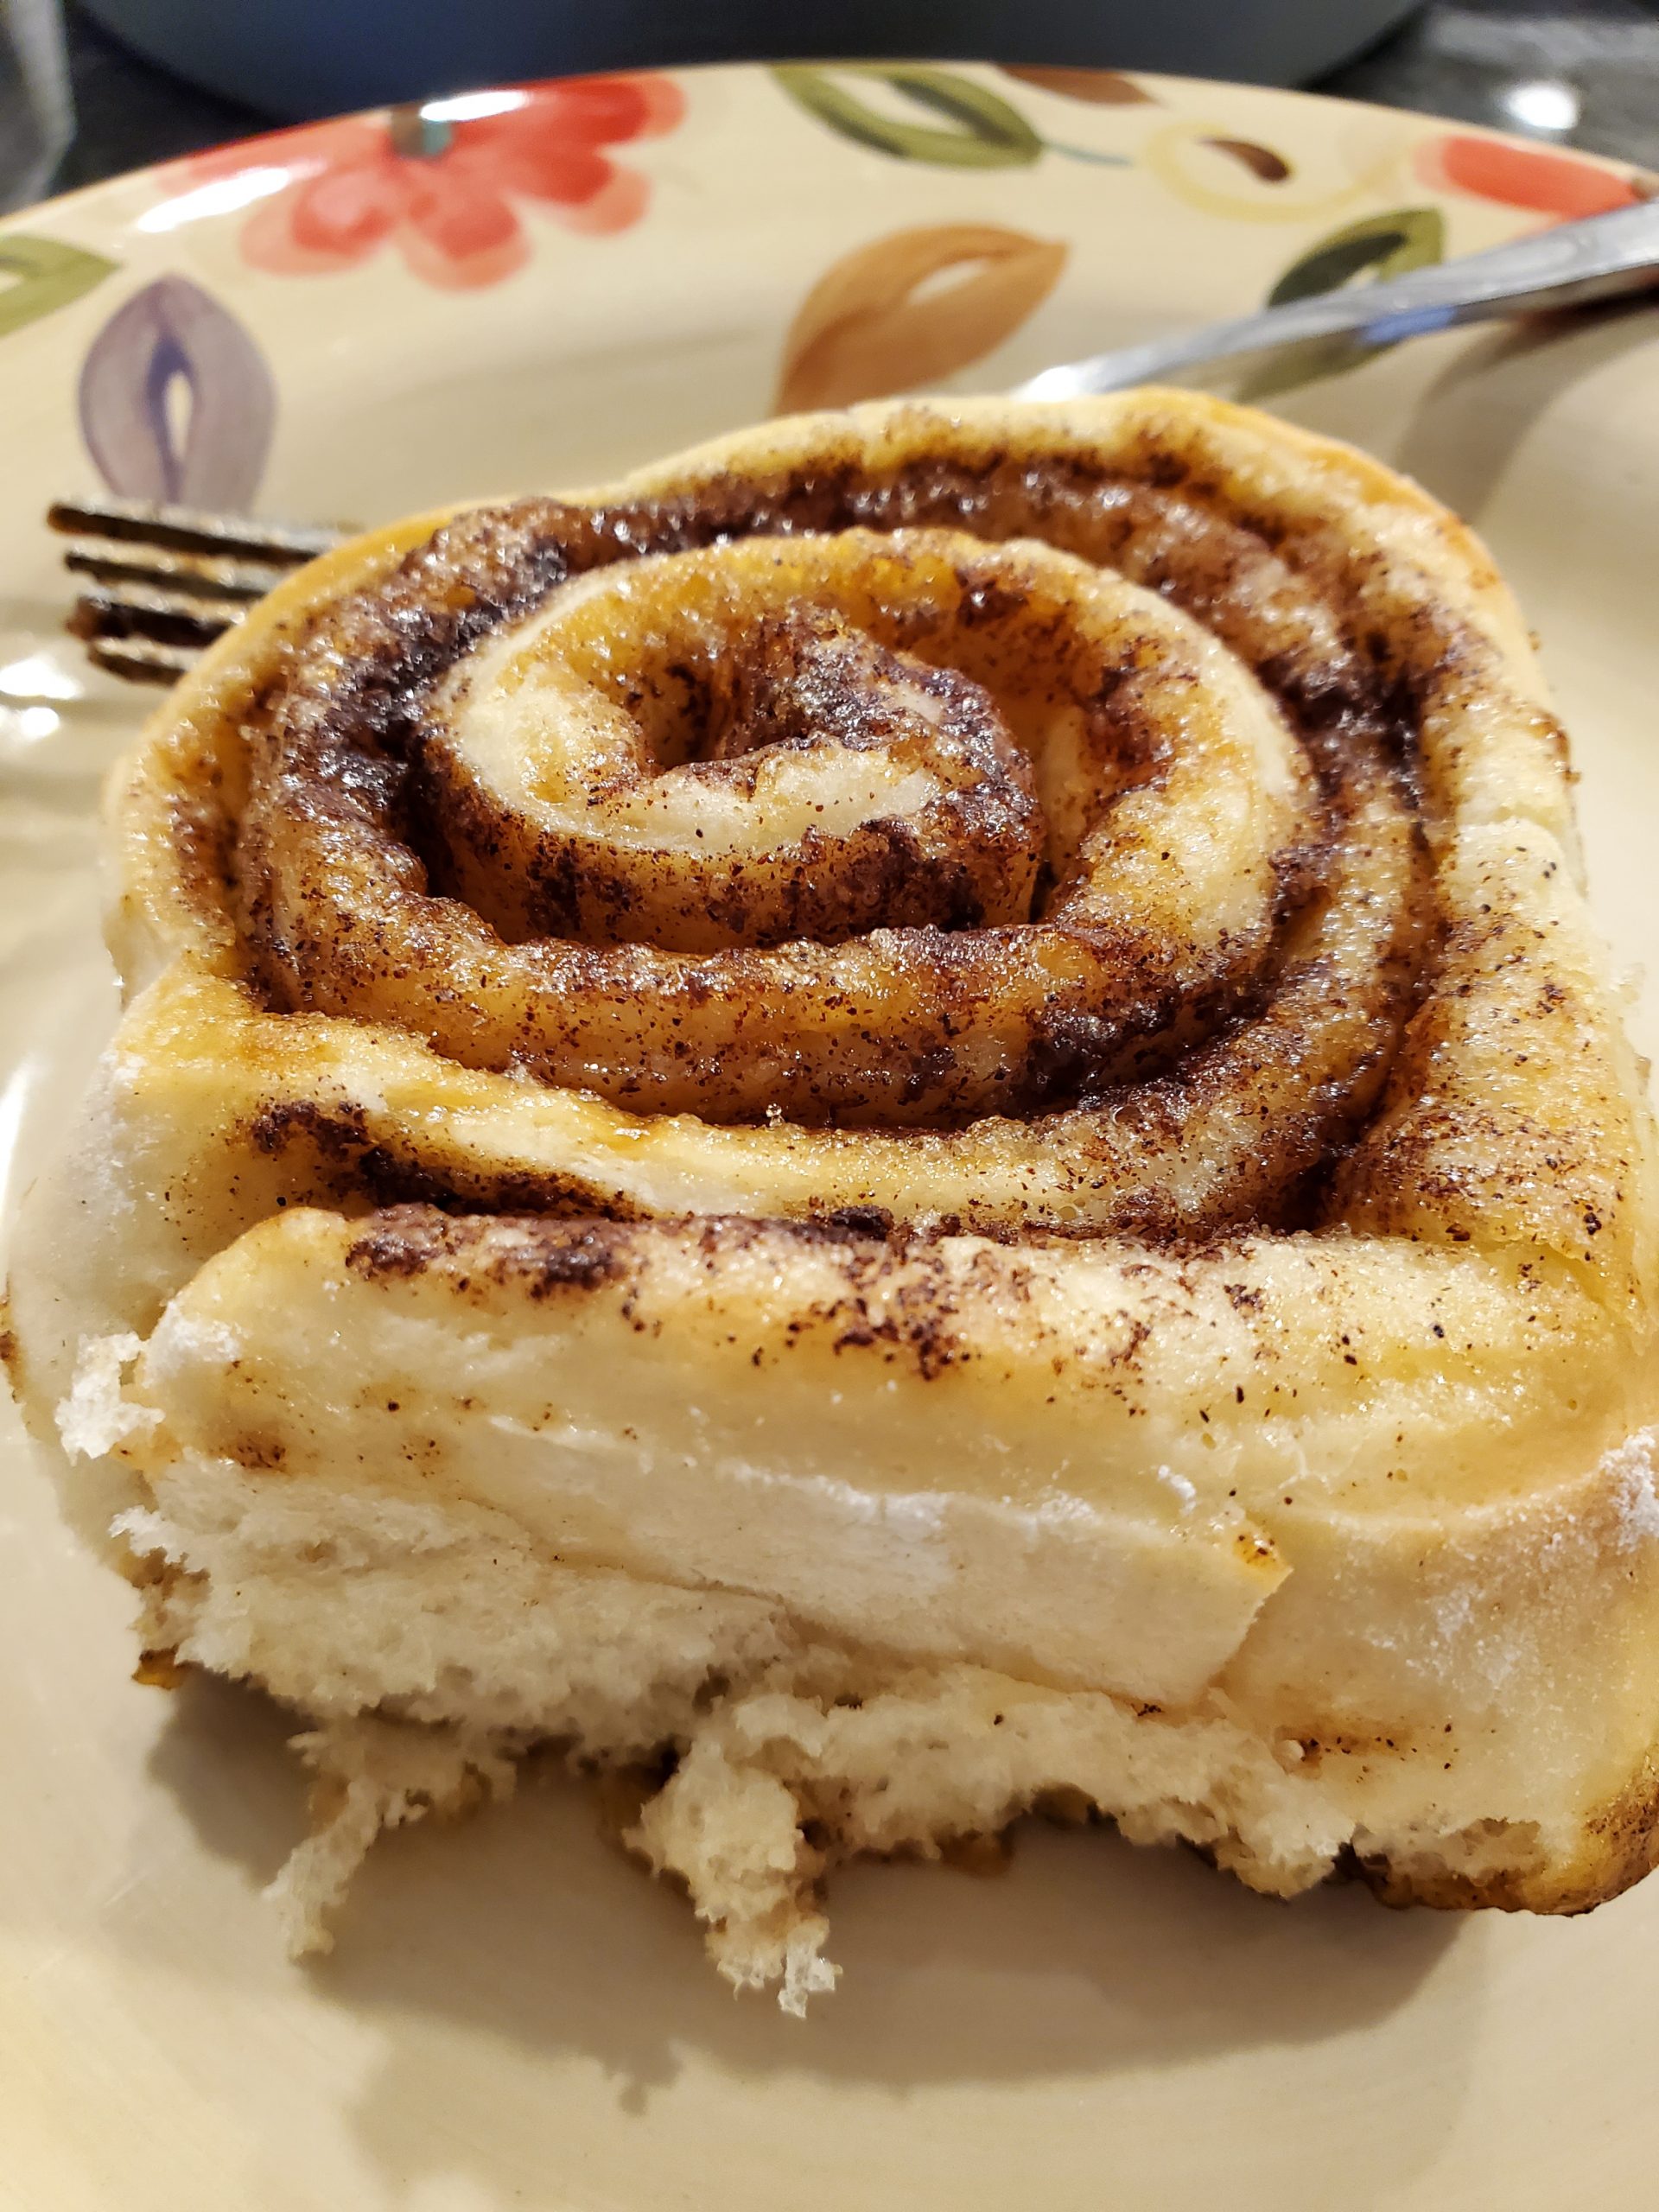
Bake 25 to 30 minutes or until golden brown. Immediately remove from pan. You can see the brown sugar caramel goodness of these cinnamon rolls.

Let cool slightly before adding icing to the warm rolls.
To icing or not to icing
You will notice that mine doesn’t have icing. That’s because we like our cinnamon rolls hot out of the oven just the way they are. Believe me, they’re hard to beat like that.

If you prefer icing, try my Perfect Cream Cheese Icing recipe, or if you would rather have a drizzle of icing on the top, you can find the recipe for Powdered Sugar Icing here as well.
Both are good, it’s really is just a matter of preference.
I hope you try this recipe for yourself and it becomes a family favorite! ❤

Best Cinnamon Rolls
Ingredients
Dough Ingredients
- 3-3 1/2 cups all purpose flour
- 1/4 cup sugar
- 1 tsp. salt
- 1 pkg. active dry yeast
- 1/2 cup water
- 1/2 cup milk
- 1/4 cup butter
- 1 egg
Filling Ingredients
- 1/4 cup butter, softened
- 1/2 cup sugar or firmly packed brown sugar
- 4 Tbsp. cinnamon
Instructions
- In large bowl, combine 1 cup of flour, sugar, salt and yeast; blend well. In small saucepan or microwave, heat water, milk and butter until warm (110 to 120 degrees). Add warm liquid and egg to flour mixture. Blend at low speed until moistened; beat 3 minutes at medium speed. By hand, stir in an additional 2 to 2 1/2 cups flour until dough pulls cleanly away from sides of bowl.On floured surface, knead 1/2 to 1 cup flour until dough is smooth and elastic. You can also use the dough hook on your mixer.Place dough in greased bowl; cover loosely with a light cloth. Let rise in a warm place (80 to 85° F.) until light and doubled in size, about 45 to 60 mins. Punch down dough several times to remove all air bubbles. Generously grease 13 x 9 inch pan. On lightly floured surface, roll out dough into 18 x 12 inch rectangle. Spread with 1/4 cup butter. In small bowl, combine sugar and cinnamon; blend well. Sprinkle over dough. Starting with the 18 inch sidroll up tightly, pressing edges to seal. Cut into 18 slices; place slices, cut side down, in greased pan. Cover; let rise in warm place until light and doubled in size, about 35 to 45 mins.Heat oven to 375°F. Uncover dough. Bake 25 to 30 minutes or until golden brown. Immediately remove from pan; place on wire racks. Cool slightly. Add drizzle icing to warm cinnamon rolls. For cream cheese icing, allow to almost cool completely, yet still slightly warm. Drizzle IcingCream Cheese Icing